In this article, I’m going to teach you how to make your own personalized magnetic tile puzzles for your toddler.
Magnetic tiles feel like a right of passage for kids these days. I was so excited to purchase a box for my 2-year-old boy. Unfortunately, I quickly learned that he was just a bit too young for magnetic tiles. I had to figure out other ways to use the tiles in order to justify such an expensive purchase to my husband. 🤣 Hence, the creation of magnetic tile puzzles!
This post may contain affiliate links. That means we may make a small commission on items purchased through links in this post at no extra cost to you!
Here’s what’s in this post:
What Supplies Will You Need?
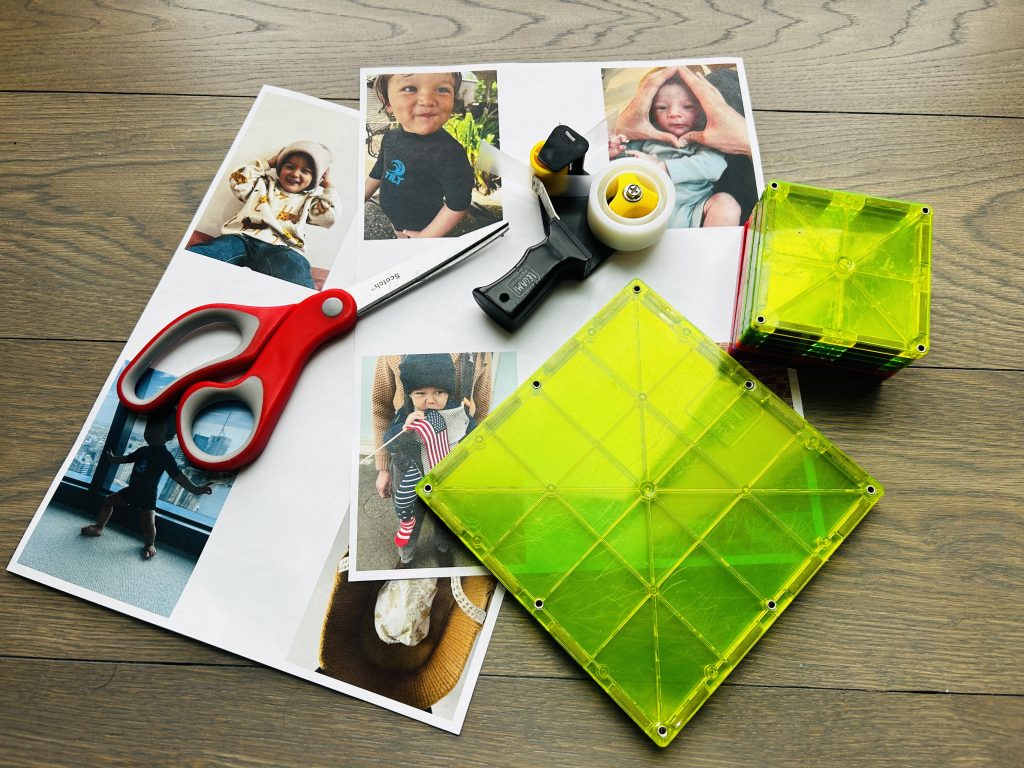
Before you get to work, you’ll want to make sure you’ve got all your supplies ready to go. These puzzles are fairly straight forward, so you’re not going to need anything too wild.
- Magnetic Tiles
- There are so many brands of magnetic tiles now, but don’t be fooled. I know the price tag of the OG Magnatiles is higher than other brands, but there’s a clear reason for that. They are superior. Believe me, I’m always looking for a more affordable option for things. I have tried cheaper brands, and they just didn’t cut it. They were super weak. I threw them all away. Save yourself the trouble, and get the real deal straight away.
- Scotch Tape
- Be extra cautious about which tape you use for your puzzles. The only tape I recommend that will 100% NOT leave residue on your magnetic tiles is Scotch Tape. You can use a traditional Scotch Tape Dispenser or use this most incredible little mini tape gun. I used the tape gun, and it’s so easy to use and hold. Any method will do the job, just be sure to use Scotch Tape if you want to keep those tiles clean and free of residue.
- Scissors
- Nothing revolutionary to add here. You’ll need scissors to cut your printed photos out.
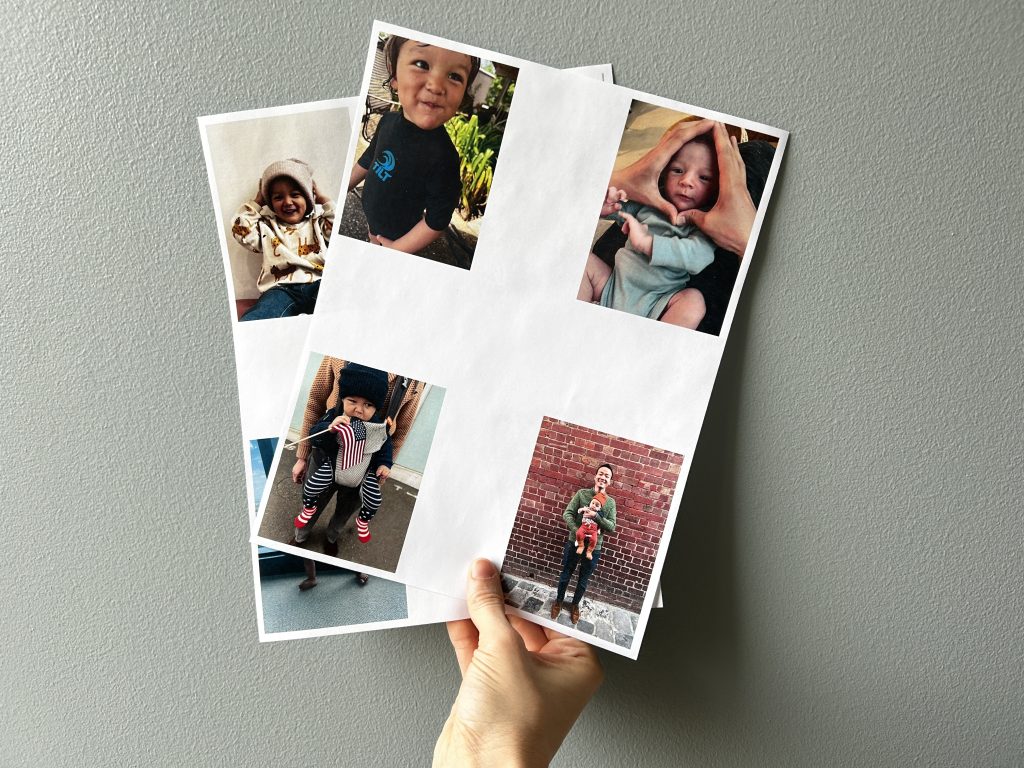
- Personalized Print Outs
- This is the most fun part! Go through your photo album on your phone or computer and pick the photos that bring you joy. It was so hard to choose only a few photos of my boy. I wanted to use all of them! After I chose the photos on my phone, I air-dropped them to my computer and dragged the photos onto a blank document before printing the document.
How To Construct Your Puzzles

Now that you have all of your materials ready to go, it’s time to create some amazing puzzles!
Each puzzle will need two small square magnetic tiles, so count your photos and gather the appropriate number of tiles. Put two small square tiles together and use your Scotch tape to attach one photo to the tiles. I like to put the seem of the tiles in the middle of the photo but that’s because I’m a little OCD. It doesn’t have to be perfect.
After you tape the photo onto the tiles, take a sharp, straight edged knife or box cutter and slice through the photo directly on the seem between the two tiles.
I also taped the raw, cut edge of the photo onto the tile because my excited toddler quickly began tearing the raw, cut edge of the photo off of the tile. He always keeps me on my toes, finding all the weak spots in my creations!
And voila! You’ve completed your adorable, personalized magnetic tile puzzles! Now it’s time to have fun!
4 Additional Tips
Here are some additional tips to enhance your puzzle experience:
1. Utilize Your Fridge
This is probably obvious to most people, but I was delighted to discover that the magnetic tiles stick to the fridge! Incredible! The fridge provided the ideal platform for my toddler to use in his exploration of the puzzles. I attached all of the tile puzzle pieces to the fridge so my son was able to easily push the pieces around and match them up.
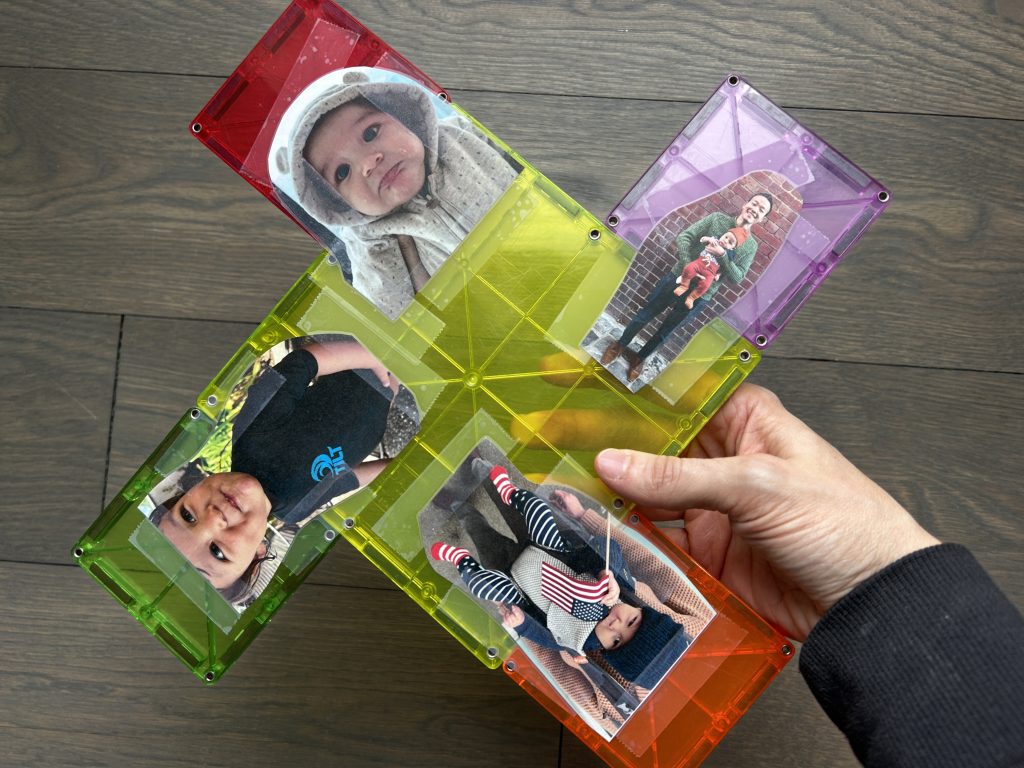
2. Increase The Difficulty
Don’t stop with simple 2-piece puzzles! As shown above, you can create many different puzzle versions. The example above used one large square tile and four small square tiles.
Depending on the tile set you purchase, you’ll have different shapes to utilize. Let your creative spark go wild here. Use three small squares for each puzzle. Use triangles, circles, whatever you want! Options are endless.
3. Use A Baking Sheet
Similar to the fridge idea, a baking sheet is perfect for keeping all the tiles in one place, giving your toddler’s adorably small hands an easy-to-move-and-manipulate experience. I recommend using the bottom of the baking sheet as the tiles may leave scratches when moved around the baking sheet.
4. Don’t Stop With Your Own Photos
If you have some magazines laying around, have a look through them, and find photos you like. Cut them out and make puzzles from the magazine pages. This is a bit easier than printing out your own photos if you don’t have easy access to a printer.
Wrapping It Up
I hope you enjoyed learning how to make your own adorable puzzles!
If you’re often on the lookout for toddler activities, I’d love to help you. I’m a former early childhood ed teacher with over 10 years of experience, so I’m used to coming up with activities, games, all the DIY things.
I know it can be overwhelming to come up with activities for your toddler. That’s why I created the Mama Village Of One newsletter. Each week, I send out DIY toddler activities, printables, tips to help stay-at-home moms thrive, and more! I would love to have you join the fam!
Talk soon! ~Julie
4 thoughts on “DIY Magnetic Tile Puzzles For Toddlers: Personalized Edition”